Clash Nyanpasu is developed based on Clash Verge and also has a similar interface design to Clash for Windows, so the user experience is not much different from these two clients. Those familiar with these projects can easily switch.
Download and Installation
Download the client version that corresponds to your system from the homepage. Clash Nyanpasu supports Windows, macOS, and Linux systems.
Adding Subscriptions
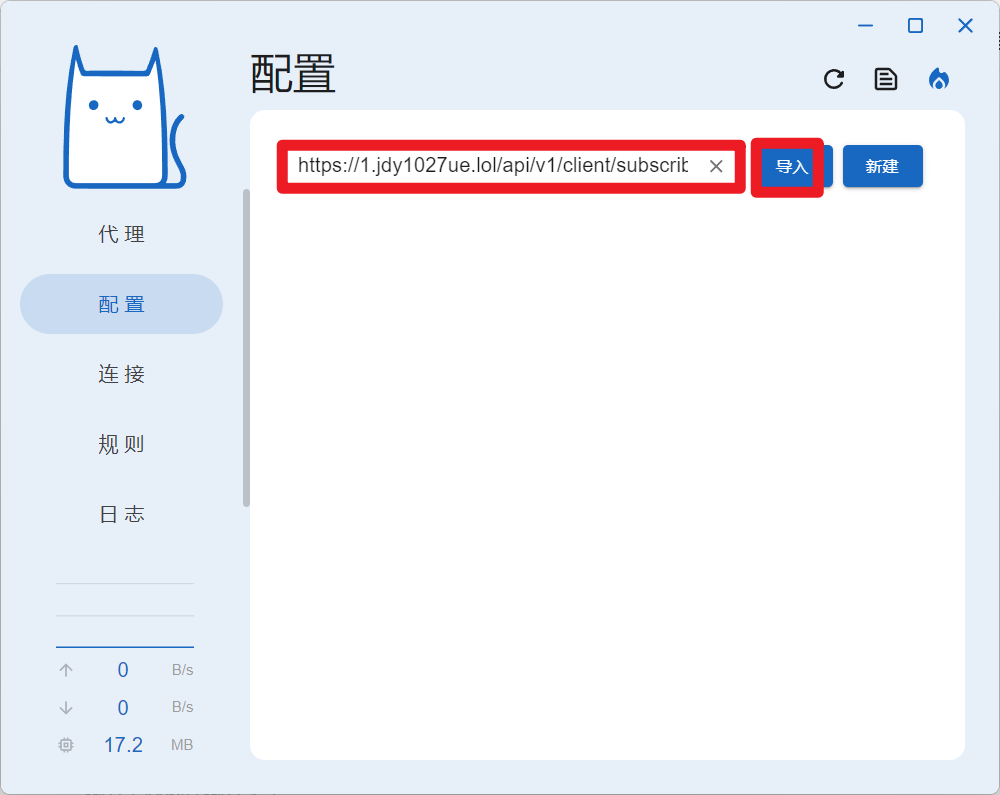
After launching, select “Configuration” from the left menu, then enter the airport subscription address in the address bar on the right and click “Import” to add.

Once imported successfully, the proxy node information contained in the subscription will be displayed below, as shown in the figure.

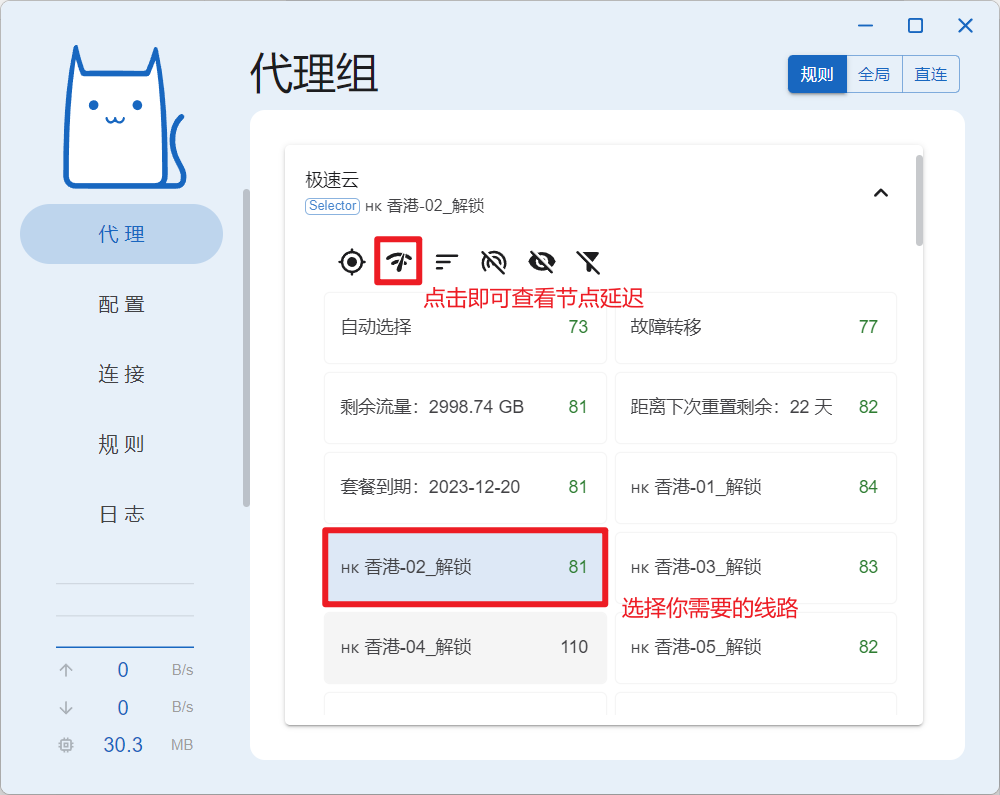
Select “Proxy” from the left menu to see all the current nodes. First, click the button above to test the speed of all nodes, then choose the appropriate line from below.

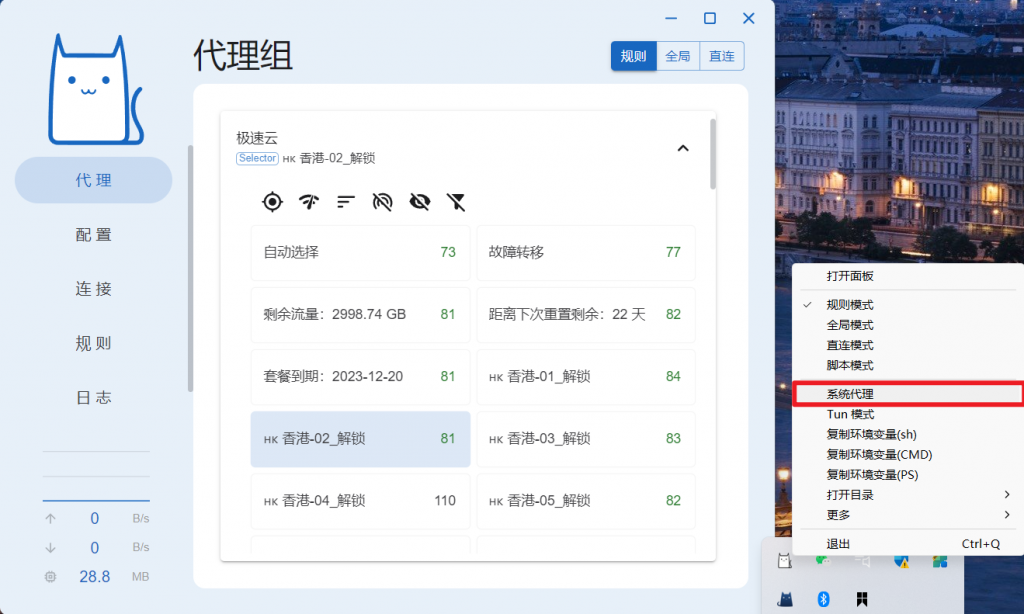
The last step is to choose the system proxy. For Windows, find the application icon in the bottom right corner tray, right-click it, select “System Proxy” to start using it.

Choosing a Proxy Mode
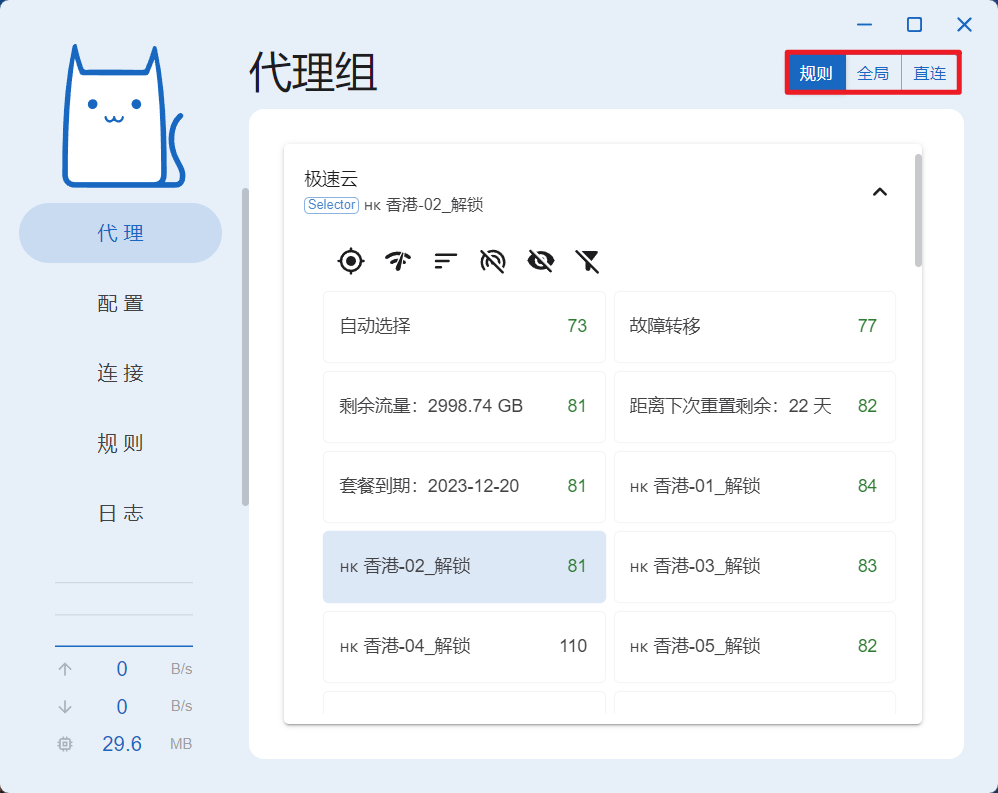
Clash Nyanpasu supports three proxy modes, which you can choose and switch between based on your needs:
- Global: All requests go through the proxy server.
- Rule: Intelligent selection of which requests go through the proxy server based on routing configuration rules (recommended).
- Direct: All requests do not go through the proxy server.

